You’ll need about 40 sheets of 48×48-inch corrugated cardboard, fasteners, and paint to build your home planetarium dome, which spans approximately 12.5 feet in diameter. Start by creating accurate triangle templates using gore section calculations, then assemble the structure at a 20-degree tilt with helpers. Install proper ventilation and projection systems for ideal viewing conditions. Paint the interior flat matt grey to enhance the cosmic experience. The journey through your personal universe awaits with these foundational steps.
Essential Materials and Setup Requirements
Building your own home planetarium requires careful planning and a substantial collection of materials before you’ll see stars dancing across your ceiling.
You’ll need to start with dome materials including 40 sheets of 48 x 48 inch corrugated cardboard or 15 sheets of 48 x 96 inch cardboard, along with fasteners and black paper for the interior. The assembled dome needs to be painted with flat matt grey paint for optimal viewing conditions, as this helps to create a true cosmic experience. For a more cost-effective alternative, consider using heavy duty tarps which can save thousands compared to commercial options.
Power planning is essential for your setup’s success.
You’ll want to establish multiple circuits for your equipment, ensuring you’ve got clean power for projectors, sound systems, and lighting.
Don’t forget about ventilation – you’ll need an extractor fan with a black power cable that’s 25-50 feet long.
Place your power outlets strategically to avoid creating tripping hazards, and remember to position seating so everyone gets an unobstructed view of your cosmic display.
Step-by-Step Construction Guide
Now that you’ve gathered your materials, let’s get started with the actual construction of your dome. The key to successful assembly techniques lies in careful planning and precise execution, ensuring both structural integrity and stunning dome aesthetics. Additionally, consider incorporating projector size into your design to ensure optimal viewing characteristics for your planetarium.
Follow these essential steps to bring your planetarium to life:
- Create accurate triangle templates using the gore sections calculation formula, marking your patterns clearly on the ground.
- Assemble your pentagon and triangle sections using heavy-duty clips, maintaining careful alignment at all corners.
- Tilt the entire structure at a 20-degree angle while working with multiple helpers for best viewing.
- Install your ventilation system and door frame before securing the final panels.
Remember to double-check all connections and support points before proceeding to the next phase of your build. Cut precise 5-cm flaps on all triangle panels to ensure secure connections between components. The finished structure should measure approximately 12.5 feet in diameter when properly assembled.
Safety Measures and Ventilation Tips
While creating your home planetarium can be an exciting project, ensuring proper safety measures and ventilation is essential for both comfort and security.
You’ll need to establish clear safety protocols, including maintaining a designated exit path and proper ventilation solutions to prevent stuffiness. A calming environment encourages relaxation, similar to what a home star projector can provide.
Don’t set up your dome outdoors where moisture and sunlight can damage it, and if you’re in a hot climate, choose an air-conditioned room.
To improve airflow, position an electric fan with a protective cage near the entrance, keeping it at least 18 inches from the dome’s fabric.
You can enhance ventilation by constructing a simple extraction system using black foam-board.
Remember to handle equipment carefully, secure power cables with safety hooks, and always keep emergency tools like scissors and flashlights readily available.
When assembling the dome structure, you’ll need approximately 400 binder clips to ensure all seams are properly secured and stable.
For easy annual maintenance and setup, consider using box rivets in your construction as they allow for simple assembly and disassembly.
Creating Accurate Star Patterns
Creating accurate star patterns in your home planetarium starts with understanding basic celestial mapping, which includes learning major constellations and their seasonal positions. You’ll need to carefully align your projection equipment to match real sky coordinates, ensuring that stars appear in their correct relative positions to one another. A star projector’s variety of projection capabilities can also significantly enhance the realism of your star patterns. Whether you’re using a professional star disc or creating your own projection system, it’s crucial to reference reliable star charts and astronomical data to achieve authentic representations of the night sky. Consider using LED lighting systems for bright, efficient star projection that closely mimics natural conditions. For optimal viewing results, operate your planetarium in complete darkness to maximize projection clarity and accuracy.
Star Mapping Fundamentals
To master the art of star mapping, you’ll need to understand how basic geometric patterns form the foundation of celestial representations. Understanding star geometry isn’t just about drawing lines – it’s your gateway to recreating the mysteries of the night sky in your own space.
Each equal angle and side is crucial for creating symmetrical celestial patterns that accurately represent star formations. Star projectors can serve as valuable aids in this process, providing a visual context for the constellations and star patterns you aim to recreate.
When diving into celestial navigation and star mapping, follow these essential steps:
- Start with regular polygons (pentagon for a 5-pointed star)
- Connect alternate vertices to create your star pattern
- Confirm your polygon has more than 4 sides
- Double-check that your star points match your polygon sides
You’ll find that mastering these fundamental patterns opens up endless possibilities for your planetarium project. Just like STAR alignment tools in modern astronomy, precise mapping techniques are essential for accurate celestial representations.
Whether you’re using traditional drawing methods or modern apps, these geometric principles will help you create authentic celestial displays that capture the wonder of the night sky.
Projecting Constellation Patterns
Since mastering constellation projections forms the backbone of any home planetarium, you’ll need to understand both the technical aspects and artistic elements of recreating star patterns.
To accurately project constellations that’ll serve both constellation mythology studies and celestial navigation purposes, focus on recreating precise star brightness and positioning.
Start by ensuring your projection system can display varying levels of star brightness and proper star colors – from Betelgeuse’s distinctive red hue to the subtle variations between planets.
You’ll want to replicate the natural twinkling effect while maintaining positional accuracy that matches real sky observations.
Consider using LED-based systems for energy efficiency and better color representation, and don’t forget to account for your dome size when selecting projection equipment. Additionally, investing in higher-quality projectors typically results in superior accuracy in star patterns, enhancing your overall stargazing experience.
Alternative Design Options and Projects
While traditional home planetariums often follow standard designs, you’ll find an exciting range of alternative approaches that can transform your astronomical viewing experience.
From DIY innovations to cutting-edge technologies, you’ve got multiple options to create your perfect stargazing sanctuary.
Consider these innovative design alternatives:
- Paint bucket planetariums featuring laser shows and nebula effects, perfect for portable viewing
- Inflatable domes that you can set up and store as needed
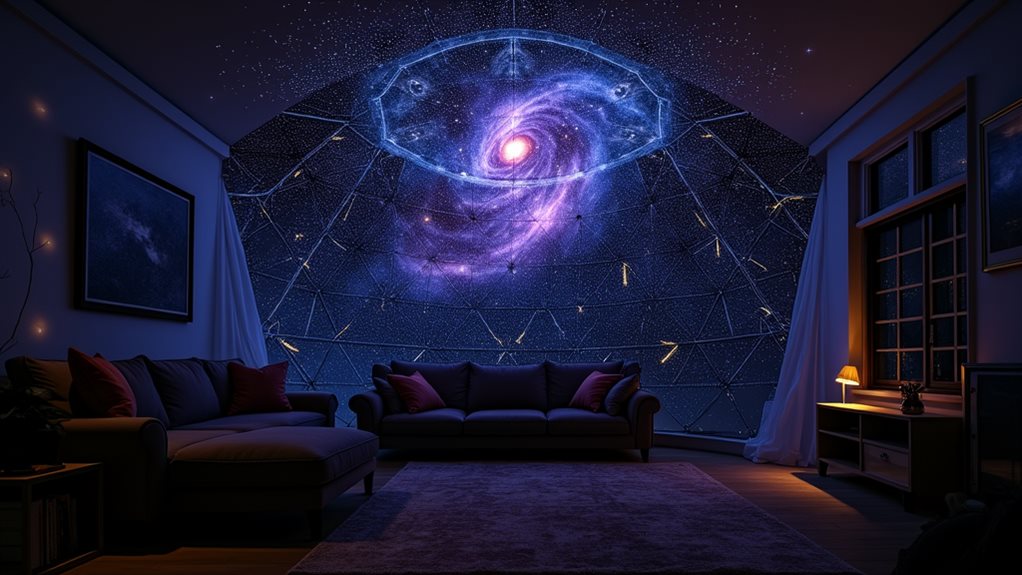
- Geodesic structures offering immersive 360-degree projections
- VR-integrated systems that let you explore deep space interactively
You’re not limited to conventional setups – modern alternative design options offer unprecedented freedom to customize your experience. Additionally, understanding projection features like timers and animations can enhance your overall enjoyment.
Whether you’re working with a tight budget or ready to invest in advanced innovative technologies, there’s a solution that matches your vision and space requirements.
Educational Activities and Learning Resources
Once you’ve set up your home planetarium, you’ll discover an incredible range of educational activities and learning resources that can transform your space into a dynamic astronomical classroom.
You’ll want to incorporate hands-on STEAM activities, like crafting glow-in-the-dark constellation bottles or building simple DIY telescopes, which make learning both engaging and memorable.
Take your exploration further through astronomy storytelling sessions, where you can blend ancient myths with modern scientific understanding.
Create interactive lessons using Moon Dough to explore lunar surfaces, or design creative exploration stations where learners can teach each other about the planets and stars.
You’ll find that multidisciplinary approaches, combining art, science, and technology, help develop problem-solving skills while fostering a genuine sense of wonder about the cosmos. Additionally, involving children in hands-on activities such as stargazing can create excitement and a lasting interest in astronomical concepts.
Frequently Asked Questions
How Long Does the Plastic Planetarium Typically Last Before Needing Replacement?
Your planetarium’s lifespan depends on durability factors like usage and environment. With proper maintenance tips, you’ll get 2-3 years with heavy use, or up to 5+ years with moderate use and careful storage.
Can Multiple Projectors Be Used Simultaneously for More Complex Displays?
You can definitely use dual projector setups to create more dynamic displays. When properly synchronized, multiple projectors will give you the freedom to display complex celestial scenes with enhanced detail and coverage.
What’s the Minimum Ceiling Height Needed for Effective Star Projection?
You’ll need at least 8 feet of height for ideal star projection, but you can adapt to 7 feet with careful projection angles. Different ceiling materials may affect quality, so consider your setup’s flexibility.
Does Weather or Humidity Affect the Planetarium’s Performance?
Yes, weather conditions can impact your planetarium’s performance. High humidity levels will cause condensation on equipment and lenses, while extreme temperatures affect electronic components. You’ll want to maintain controlled indoor conditions for ideal viewing.
How Can Light Pollution From Nearby Windows Be Effectively Blocked?
You’ll get the best light blocking results by layering window treatments. Install blackout curtains over cellular shades, and don’t forget side channels to eliminate gaps. Dark-colored fabrics work especially well.
Final Thoughts
You’ve now got all the tools and knowledge needed to create your own home planetarium, a gateway to exploring the cosmos from your living room. Whether you’re using high-tech projectors or simple pinhole designs, you’ll find that bringing the night sky indoors can transform both learning and leisure time. Remember to prioritize safety, maintain proper ventilation, and most importantly, let your astronomical creativity guide your stellar journey.