Place your starlight projector in a central location, ideally 4-6 feet high on a sturdy surface like a desk or shelf. You'll want to position it where it has clear sightlines to your ceiling and walls, away from direct sunlight and competing light sources. For the most immersive effect, aim the projector slightly upward and guarantee there aren't any obstacles blocking its path. Consider using extension cords for flexible positioning, and experiment with different angles to find your perfect coverage area. The right placement can transform your room into a mesmerizing personal planetarium, with countless possibilities to enhance your celestial display.
Finding the Perfect Placement
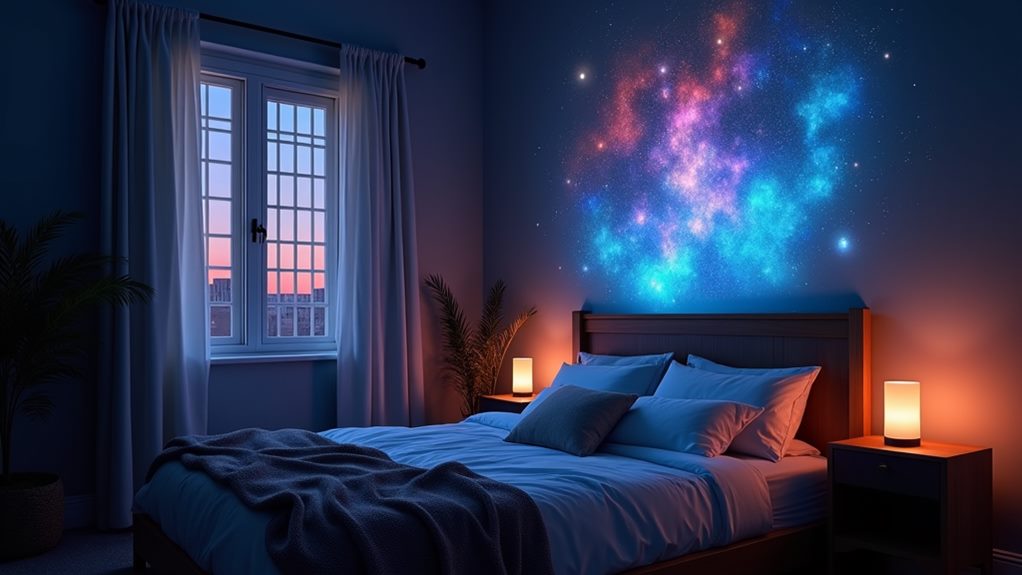
A well-placed starlight projector transforms any room into a mesmerizing celestial display. When considering the perfect spot for your projector, you'll want to focus on two main positioning strategies that deliver stunning visual effects. The ideal distance for peak brightness can greatly affect your experience; as noted in the brightness levels, closer placements yield brighter images.
The first approach is placing your starlight projector in the room's center, which provides optimal coverage across your ceiling. This central positioning guarantees an even distribution of light patterns and creates an immersive atmosphere throughout the space.
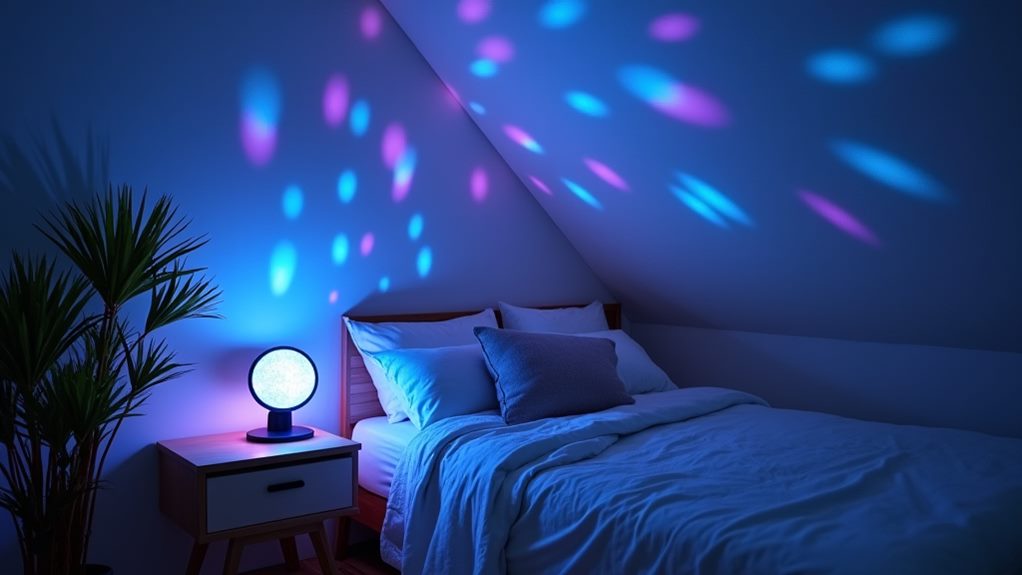
Your second option is positioning the device in a lower corner, angled toward the room's center, which can create depth and drama in your celestial display.
Don't hesitate to experiment with different angles and heights – even subtle adjustments can remarkably enhance the overall effect. You'll want to avoid areas where direct sunlight might interfere with the projection's visibility.
For maximum impact, position your projector away from windows and confirm you can easily turn off other light sources in the room. This allows the stars and patterns to shine their brightest, creating the ethereal ambiance you're after.
The key is finding that sweet spot where the projection covers your desired area while maintaining clarity and vibrancy.
Room Setup Essentials
Successful starlight projection begins with essential room preparations that set the stage for an enchanting display. Creating the perfect environment means paying attention to both your projector's placement and the surrounding space.
When you're setting up your room for ideal viewing of red, blue and red, or red and green star patterns, consider these fundamental elements for the best experience. To achieve an impressive atmosphere, consider the various types of projectors available, like bulb-based projectors that may better suit your needs.
- Position your projector on a sturdy surface that won't vibrate or shift, guaranteeing consistent light patterns throughout your viewing session.
- Clear the space between your projector and ceiling of any obstacles that might interfere with the light projection.
- Eliminate competing light sources by closing curtains and turning off other lights in the room.
- Create a dedicated viewing area with comfortable seating positioned for the best vantage point.
For maximum impact, place your projector in a strategic corner location, angled toward the room's center. This setup guarantees thorough coverage while maintaining the clarity of individual star points.
Remember to test different height levels and angles before settling on your final arrangement, as even slight adjustments can dramatically improve the overall effect of your celestial display.
Lighting and Power Considerations
Once you've established the perfect room setup, proper lighting and power management become the next key elements for your starlight projector's performance.
To maximize light intensity and achieve stunning color effects, you'll need to eliminate competing light sources. Keeping your projector away from windows and direct sunlight is vital, as external light can wash out the projection and diminish its impact. In fact, research suggests that creating a calming environment with soft ambient light can greatly improve sleep quality, helping to reduce stress and anxiety levels, which makes your projector even more effective for relaxation purposes (star projectors improve sleep quality).
Your power source setup plays a vital role in placement flexibility. Since most starlight projectors come with USB connections, you'll want to plan your power strategy carefully.
Don't let a short cable restrict your positioning options – using an extension lead can free you to place the projector exactly where you want it for ideal coverage. This flexibility allows you to experiment with different angles and heights without being tethered to a specific outlet.
For the most immersive experience, switch off all other lights in the room. This simple step greatly enhances the projector's brightness and allows the full spectrum of color effects to shine through, creating that mesmerizing celestial atmosphere you're after.
The contrast between the dark room and the projected lights will transform your space into a personal planetarium.
Creative Positioning Ideas
Beyond traditional placement options, creative positioning can transform your starlight projector into a versatile lighting feature that enhances any space. By exploring unique angles and unconventional projection surfaces, you'll discover countless ways to create immersive experiences throughout your environment.
Consider these innovative placement ideas for your starlight projector:
- Position it in a corner at a low angle, directing the beam toward the room's center to achieve maximum ceiling coverage and create a cozy, den-like atmosphere.
- Place it on an elevated surface, such as a bookshelf or cabinet, to experiment with different projection patterns and shadow effects.
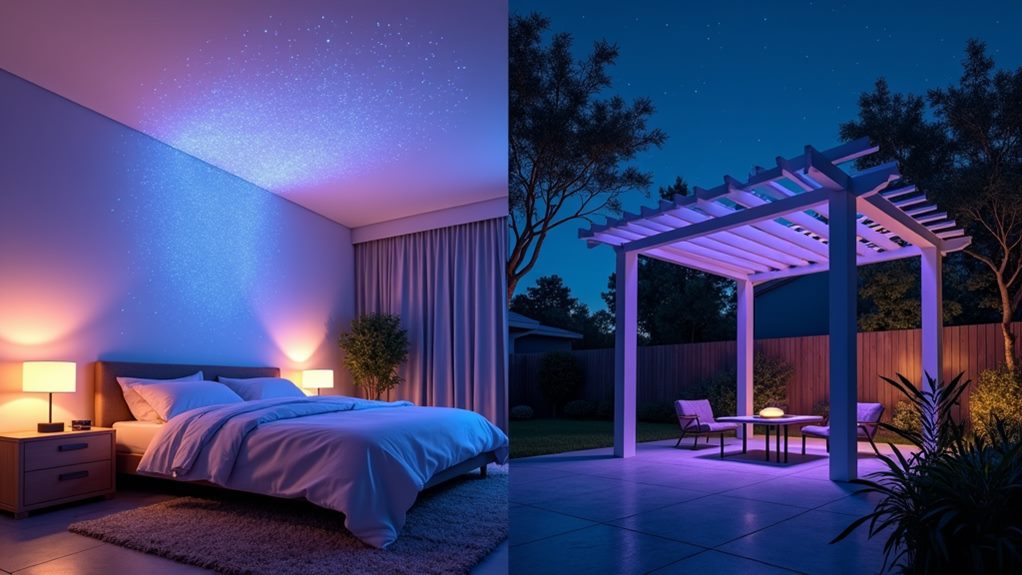
- Create an outdoor entertainment space by projecting onto exterior walls or garden features during evening gatherings.
- Mount it discreetly behind furniture pieces, allowing the stars to seemingly emerge from hidden sources.
Remember to adjust your projector's brightness based on the ambient lighting conditions.
You'll find that different surfaces and angles can dramatically alter the projection's impact, so don't hesitate to experiment with various positions until you achieve your desired effect. The key is to think beyond conventional placement and let your creativity guide you toward unique lighting solutions.
Multiple Projector Arrangements
Taking your starlight experience to new heights often involves incorporating multiple projectors into your space. Through strategic projector clustering, you'll create a more immersive atmosphere that transforms your room into a fascinating celestial display.
Position your devices in different corners to achieve extensive coverage while experimenting with various angles to discover unique lighting combinations.
Master color blending by selecting projectors with complementary hues – pair red with green or blue with white to create striking visual contrasts across your space.
You'll want to take into account distance effects when arranging multiple units, as spacing them at varying heights adds depth and dimension to the overall display.
For ideal coverage in larger rooms, place your primary projectors in central locations, then supplement with additional units in corners or alcoves.
Seasonal Display Locations
Every season presents unique opportunities to showcase your starlight projector in creative ways. When planning your holiday ambiance tips, consider both indoor and outdoor locations that'll maximize the magical effect of your projector.
Position your device strategically to transform any space into a festive wonderland, whether you're hosting intimate gatherings or large seasonal celebrations.
- Place the projector in a central room location for thorough light coverage that'll wow your guests.
- Set it low in a corner, angled toward the room's center, creating an immersive atmosphere perfect for holiday gatherings.
- Take it outdoors to project onto exterior walls or patio ceilings, extending your seasonal celebration space.
- Experiment with multiple light sources, layering them with your projector for rich, dynamic effects.
Master projector angle adjustments to achieve the most striking visual impact for your seasonal displays.
Through festive light layering, you'll create depth and dimension that transforms ordinary spaces into extraordinary environments.
Remember to secure your projector on stable surfaces and test different positions to discover what works best for your specific setting and celebration needs.
The versatility of starlight projectors allows you to adapt your lighting scheme as seasons change, keeping your space fresh and engaging throughout the year.
Indoor Vs Outdoor Spots
Selecting the perfect spot for your starlight projector requires careful consideration of indoor versus outdoor environments, as each setting presents unique opportunities and challenges.
For indoor ambiance, you'll want to position your projector centrally in the room, ensuring clear sightlines to your ceiling for maximum impact. Don't tuck it away in corners, as this will limit the magical effect you're trying to achieve.
When it comes to outdoor enchantment, you've got more flexibility with placement options. Your patio or balcony can transform into a mesmerizing nighttime retreat with the right positioning. Choose stable surfaces for your projector and keep projector safety in mind by avoiding flammable materials and direct sunlight exposure.
You'll find that portable models work exceptionally well for outdoor settings, giving you the freedom to experiment with different locations.
Whether indoors or outdoors, don't hesitate to adjust angles and positions until you find your perfect setup. Indoor spaces benefit from centralized placement for complete coverage, while outdoor areas allow you to create enchanting atmospheres across various exterior spaces.
Remember that the key to success lies in maintaining clear projection paths and ensuring proper stability in either setting.
Surface and Height Options
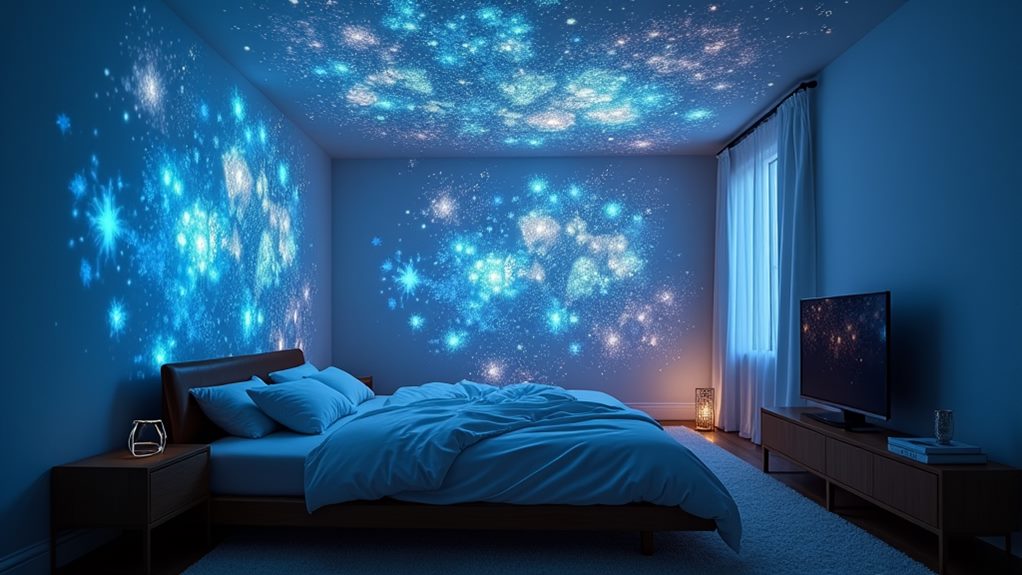
When choosing between floor placement and elevated positioning for your starlight projector, you'll achieve better coverage by placing it 4-6 feet above ground level rather than directly on the floor.
A sturdy desk or shelf provides an ideal mounting surface, offering both stability and the right height for optimal projection patterns across your ceiling.
You can maximize the projection's impact by experimenting with different angles from your chosen elevated surface, tilting the unit slightly upward to create wider coverage of the celestial display.
Elevated Vs Floor Placement
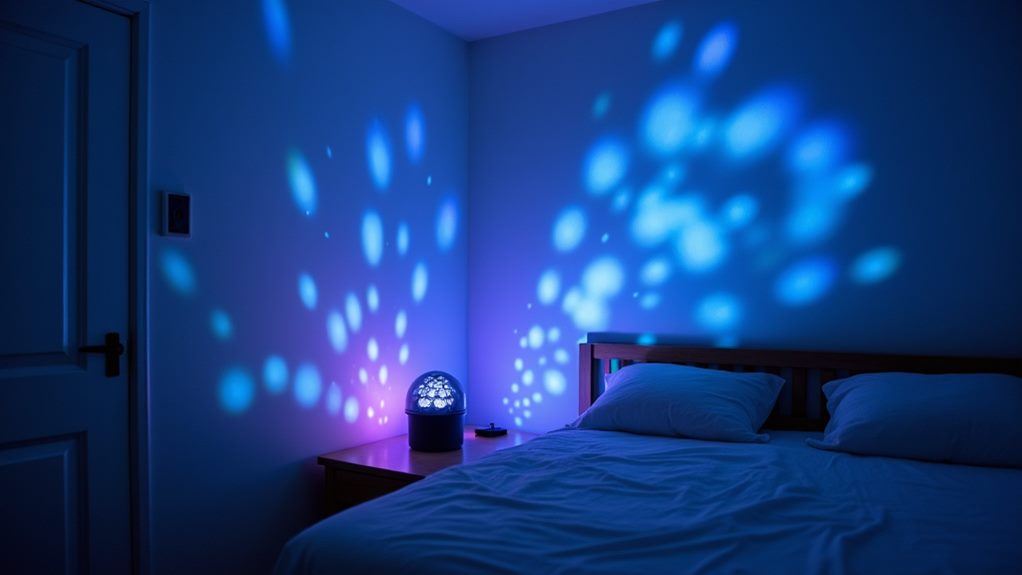
Positioning your starlight projector at different heights can dramatically alter its visual impact and coverage area. The elevated benefits include enhanced ceiling coverage and clearer projection paths, while floor immersion creates an enveloping atmosphere when aimed from a lower corner position.
You'll find that experimenting with height effects gives you versatile options for transforming your space.
Consider these placement strategies for best results:
- Mount it on a raised surface for maximum ceiling coverage and unobstructed star patterns
- Place it on the floor in a corner to create an upward sweep of light that fills the room
- Position it at mid-height on a shelf or table for balanced light distribution
- Use a sturdy platform at any height to prevent unwanted movement during operation
The key is finding the sweet spot that matches your desired ambiance. Higher positions typically offer broader coverage ideal for stargazing effects, while floor placement creates a more intimate, cocoon-like experience.
Remember to keep your projector centered in the space and away from obstacles regardless of your chosen height to maintain projection quality and achieve your desired atmospheric effect.
Desk or Shelf Positioning
A stable desk or shelf serves as an excellent mid-height mounting solution for your starlight projector. When selecting your setup location, aim for a surface that's positioned 3-4 feet off the ground to create ideal ceiling coverage. This height range provides the perfect balance between stability support and projection angle, allowing you to maximize the visual impact of your starlight display.
Central alignment is essential for achieving the best results. Position your projector toward the middle of the room rather than tucking it away in corners, which can limit the projection's reach and effectiveness.
You'll want to choose a sturdy surface that's free from clutter and capable of supporting your device without any wobbling or shifting during operation.
Don't forget to take into account practical aspects like power access when selecting your spot. If you're working with a USB-powered projector, make sure your chosen location can accommodate the wire length, or plan to use an extension cord to reach your ideal setup point.
Feel free to experiment with different heights and angles until you find the perfect position that transforms your space into a starlit sanctuary.
Special Room Applications
Transform your bathroom into a spa-like sanctuary by placing your starlight projector on a secure shelf or vanity counter, creating a mesmerizing atmosphere for your evening soak.
In children's rooms, you'll find endless possibilities to spark imagination by mounting the projector safely above eye level, where it can cast gentle star patterns that help ease bedtime changes.
Whether you're creating a magical story corner or a soothing sleep environment, position the projector to avoid direct eye contact while maintaining clear sight lines to your chosen projection surface.
Bathrooms for Starlit Baths
Every bathroom can become a serene spa-like retreat with the strategic placement of a starlight projector. Transform your ordinary bathing space into an enchanting sanctuary by positioning your projector in a corner, angled upward to create a soothing atmosphere filled with celestial themes.
When setting up your projector, remember to keep it safely away from water sources while maintaining the perfect angle for maximum coverage.
Create the ultimate ambiance for relaxing baths by taking advantage of these key features:
- Adjust brightness levels to achieve the perfect gentle glow for your nighttime routines
- Experiment with color variations to match your mood – warm tones for cozy evenings or cool hues for revitalizing mornings
- Use the projector as a sophisticated night light alternative during late-night bathroom visits
- Position the device strategically to illuminate the ceiling while keeping it protected from moisture
Fine-tune your bathroom's lighting experience by controlling the intensity and color schemes to suit different times of day.
Your starlight projector can serve multiple purposes, from creating a tranquil bathtime environment to providing subtle illumination for midnight trips, all while maintaining a sophisticated and spa-like atmosphere.
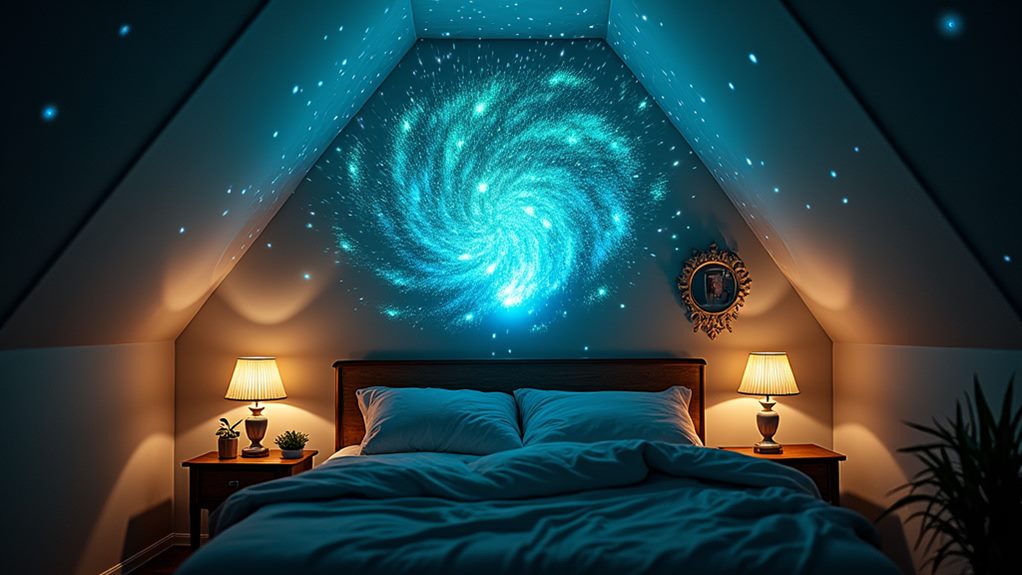
Kids' Room Night Magic
Moving from spa-like bathrooms to children's spaces, starlight projectors can create an enchanting wonderland in your kids' room.
Select a central spot on a sturdy dresser or nightstand where the projector can cast its celestial display across the entire ceiling, transforming ordinary bedtime stories into magical adventures under the stars.
Position your projector at a slight upward angle to maximize coverage and create an immersive starry environment.
You'll want to experiment with the color settings – gentle blues and greens work particularly well for calming rituals before sleep.
Consider incorporating starry themes throughout the room's decor to complement the projected display and create a cohesive nighttime sanctuary.
Make the most of your projector's remote features by setting a timer that gradually dims as your child drifts off to sleep.
Place the unit safely out of reach while ensuring it's free from any surrounding fabric or flammable materials.
This strategic positioning not only creates the perfect ambiance for bedtime but also maintains a secure environment that lets your child's imagination soar as they wind down for the night.
Final Thoughts
Your starlight projector's placement can transform any space into a cosmic wonderland, much like Edison's first light bulb changed indoor ambiance forever. Whether you're mounting it on a bedroom wall, positioning it in a home theater, or creating an outdoor entertainment space, consider your viewing angle, power access, and surface texture. By following these placement strategies, you'll create a mesmerizing celestial display that'll make every evening magical.