You’ll want to start with a 16-foot dome that fits 30 people comfortably, giving you 10 feet of headroom to fight that closed-in feeling. Build your frame from interlocking cardboard panels secured with box rivets, then test every joint for wobbling before you add skirting.
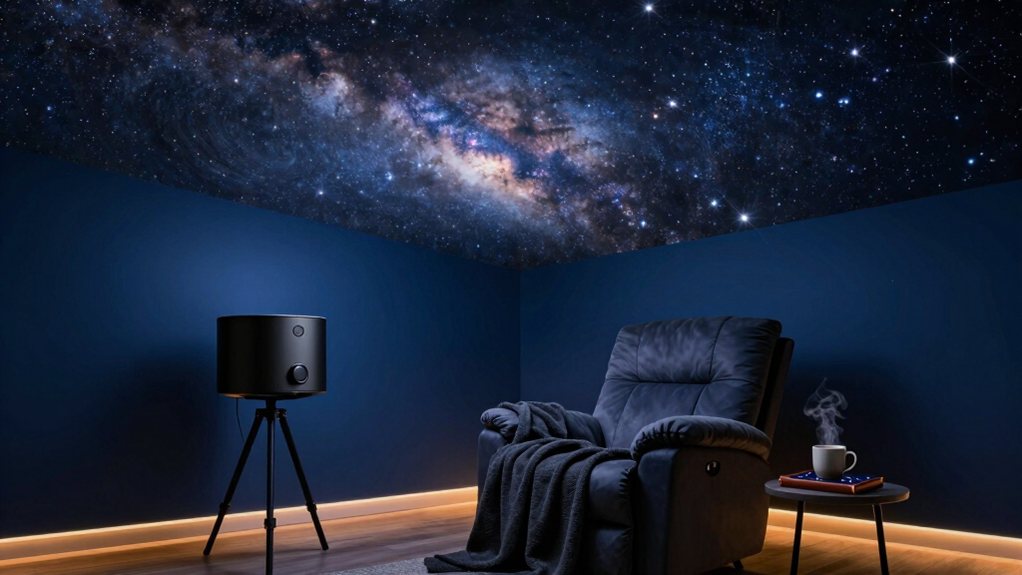
Install that skirting to hide cables and level uneven floors, then position your projector with a mirror dome to calculate the true throw distance. Black out every light source until you hit 0.5 lux, and you’ll find the darkness transforms everything you thought you knew about home stargazing.
Size Your Dome: 16 Ft Wide Fits 30 Students
Where exactly should you begin when building a home planetarium? Start by selecting your dome size, as this determines everything else. A 16-foot dome offers remarkable versatility, providing seating capacity for up to 30 students while maintaining an intimate, immersive atmosphere.
You’ll appreciate how the 10-foot interior height prevents claustrophobia without sacrificing that enclosed wonder of stargazing. Your projection setup demands careful planning, so incorporate a dedicated projector stand and mirror dome configuration to maximize image quality across the curved surface. Arrange seating strategically to ensure every participant enjoys unobstructed sight lines, transforming your space into an educational haven. The BK-12 Starry Projector Light is a great choice for enhancing your celestial ambiance with its colorful nebula options and user-friendly features.
This compact design proves you don’t need massive infrastructure to create meaningful astronomical experiences. With thoughtful spatial planning, your 16-foot dome becomes the perfect foundation for captivating cosmic exploration.
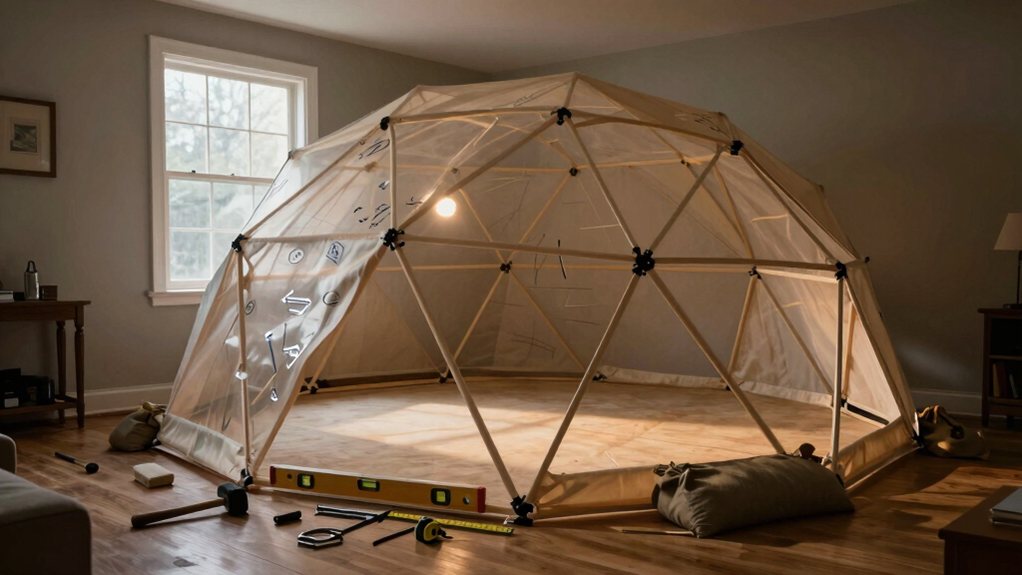
Build a Cardboard Frame That Lasts Years
You’ll want to start by selecting a geodesic design that balances complexity with durability, typically combining pentagon and hexagon panels formed from two triangle sizes where the larger B triangles match your hexagon edges for geometric precision.
Once you’ve cut your cardboard sheets with interlocking edge tabs, you’ll assemble the frame using box rivets through drilled holes, creating joints that withstand repeated handling without tearing.
This approach lets you break down and rebuild your dome each year, maintaining structural integrity through careful reinforcement and adjustable bottom spacers that accommodate your specific space requirements. Additionally, using a sturdy frame enhances the overall experience of your home planetarium by improving projection quality during use.
Geodesic Shape Selection
For your 16-foot diameter, 10-foot height classroom dome, this shape eliminates claustrophobia while housing thirty students comfortably. You’re essentially constructing a self-supporting skeleton that transfers loads efficiently through every edge and vertex. This design can also enhance family experiences by providing a cozy atmosphere for stargazing, partially thanks to its customization options that allow for personalized celestial displays.
Cardboard Assembly Method
How do you transform simple cardboard into a dome that’ll withstand years of classroom use? Start by cutting long sheets into triangles, sizes A and B, where B matches your hexagon sides. Leave tabs on every edge; they’ll bend easily and lock your cardboard model together.
For dome assembly, grab box rivets; nylon ones work best since they’re reusable year after year. Drill through those tabs, pop in the rivets, and you’ve got connections that won’t quit. Build your pentagons and hexagons, then join them into that 16-foot-wide, 10-foot-high structure.
Don’t skip the bottom skirting; it gives you room for chairs and your projector. Add spacers so you can adjust dimensions as needed. Including features for different celestial experiences will enhance your complete experience as you utilize your home planetarium.
When the school year’s done, disassemble everything. Pack it flat, transport it easily, and rebuild next semester. That’s how you craft a planetarium experience built to last.
Long-Term Structural Integrity
Building a dome that survives countless teardowns and rebuilds means thinking beyond this year’s lesson plan. Your geodesic dome demands smart material choices and intentional design decisions that prioritize structural durability without sacrificing flexibility.
Start with that cardboard frame built from two triangle sizes, ensuring your B-length pieces match hexagon sides for precise tiling. This geometric accuracy prevents stress points that weaken over time.
When you connect panels, rely on box rivets, nylon ones you can reuse, to create joints that won’t fatigue. Drill through those rivet tabs to lock connections firmly, yet keep them removable.
That bottom skirting and spacer system you built? That’s your modular assembly advantage, letting you adjust dimensions annually while maintaining integrity. At 16 feet wide and 10 feet tall, your structure accommodates thirty students comfortably, season after season. Additionally, investing in higher quality projection quality will enhance your overall experience, making your planetarium a rewarding educational tool for years to come.
Cut Panels and Lock Them With Rivets
You’ll start by cutting your cardboard into precise triangles and pentagons, leaving small tabs along every edge so you can bend and align the pieces without frustration. Match your B-length triangles to the hexagon sides, then grab your nylon box rivets, these reusable fasteners let you lock panels together while keeping future disassembly in mind. Drill clean holes through each tab, pop in those rivets, and you’re building a frame that’ll come apart and go back up year after year. This approach will contribute to a relaxing atmosphere, similar to the silent operation of the DS-FX Home Planetarium.
Cardboard Panel Cutting
Where exactly should you begin when transforming flat cardboard into the curved skeleton of your planetarium? Start with long cardboard sheets, and cut them into triangles and pentagons or hexagons. You’ll use two triangle sizes, A and B, making sure B matches your hexagon side for proper alignment.
Here’s what you’ll need to focus on:
Leave tabs on every panel edge so you’ll have clean bending points and precise alignment during assembly.
Match your B-length triangles to hexagon sides for seamless interlocking.
Cut pentagons and hexagons to form the geodesic dome pattern that gives your cardboard panels structural integrity.
Prioritize clean, accurate cuts since assembly durability depends on how well these pieces fit together.
Additionally, consider how the star projection capacity can influence your planetarium experience, as it will determine the overall effectiveness of your night sky representation.
Your careful preparation here determines how smoothly the riveting stage will go, and ultimately how many years you’ll enjoy reassembling this structure.
Rivet Assembly Method
Once your panels are cut and waiting, how do you transform them into a rigid, breathing dome? You begin the rivet assembly, the backbone of this modular construction.
Take your geodesic dome panels, those triangles and pentagons with their bent tabs, and align them at each joint. You drill holes through the overlapping tabs, then push nylon box rivets through to lock them tight. These reusable fasteners let you build, break down, and rebuild year after year without wear.
Adjust spacers as you go to fine-tune dimensions, ensuring your projector fits and chairs clear the skirting. The beauty of this system? You’re not just assembling; you’re crafting something you can evolve, maintaining your planetarium’s precision while keeping every connection secure and intentional. Additionally, considering the type of light source used in your projector can significantly enhance the overall visual experience of your planetarium setup.
Test Dome Stability Before Adding Skirting
The cardboard geodesic dome you’ve assembled needs to prove itself before you move forward with skirting installation. You’re working with a 16-foot wide, 10-foot tall structure, so take time to verify its integrity now.
Check these critical elements:
Inspect all interlocking tabs for secure engagement, ensuring none lift or shift under pressure.
Examine rivet connections throughout the frame, confirming they’re tight and properly seated.
Test joints for unwanted flex by applying gentle pressure near the base.
Validate that your spacers and box rivets maintain precise dimensions for seamless skirting fit.
Apply light loads around the base to simulate skirting weight. If you detect wobbling or gaps, reinforce now. You’re planning annual disassembly, so confirm every connection remains operable.
A stable dome stability foundation prevents headaches later, and you’ll thank yourself when that skirting attaches perfectly. Additionally, consider that the lifecycle of a planetary nebula influences your understanding of how structures evolve in their environments.
Install Skirting to Hide Cables and Level the Base
Once you’ve confirmed your dome is stable, you’ll want to tackle the finishing touches that make your setup truly professional. Start by addressing cable management solutions that keep power cords and data lines completely out of sight, then apply base leveling techniques to ensure your skirting sits flush against the floor without awkward gaps or tilting. Additionally, creating a soothing environment can greatly enhance your overall experience, especially if you plan to incorporate activities like meditation or astral projection.
Cable Management Solutions
Although a home planetarium’s magic happens overhead, you’ll quickly discover that what lies at your feet demands just as much attention. Smart cable management and strategic skirting transform your dome’s base from cluttered eyesore to seamless foundation. Here’s how to achieve perfect concealment:
Install adjustable skirting panels that compensate for uneven floors, creating a flush perimeter
Route power, data, and AV cables through hidden channels inside the skirting with grommet access points
Secure loose wiring with Velcro or zip ties inside the skirt cavity, limiting exposed lengths
Design modular sections you can remove for maintenance without dismantling everything
This approach eliminates trip hazards, reduces visual distraction, and keeps your immersive sanctuary pristine. Your planetarium deserves nothing less than polished professionalism from dome to floor.
Base Leveling Techniques
Now, address those cables. Install skirting around the dome’s base with spacers or brackets that allow height adjustments for uneven surfaces. Run integrated cable channels beneath this skirting, keeping wires invisible yet accessible.
You’ll create that uninterrupted viewing area while maintaining easy maintenance access. Your home planetarium deserves this polished foundation, it’s where stellar experiences truly begin.
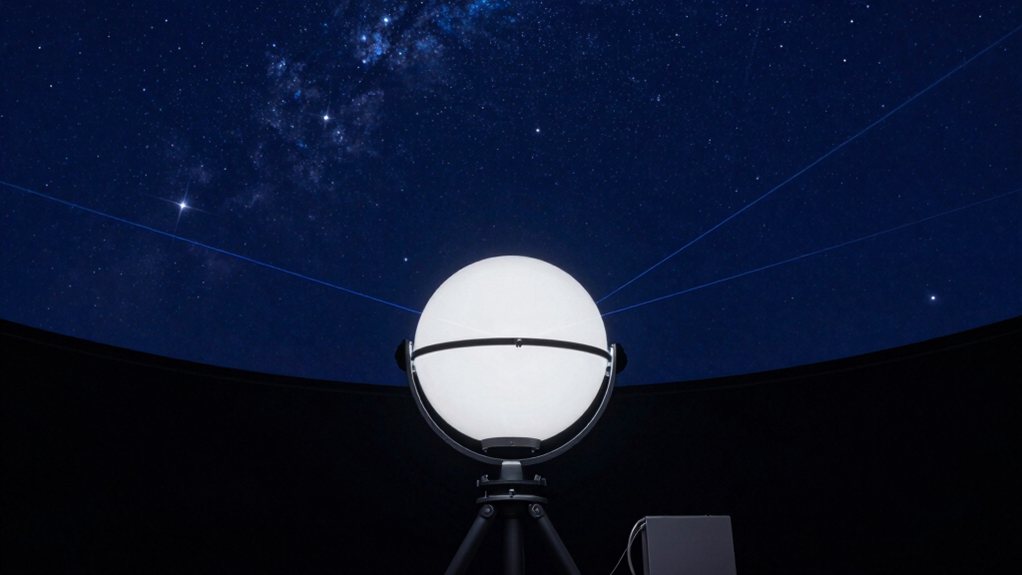
Mount Your Convex Mirror Dome Above the Projector
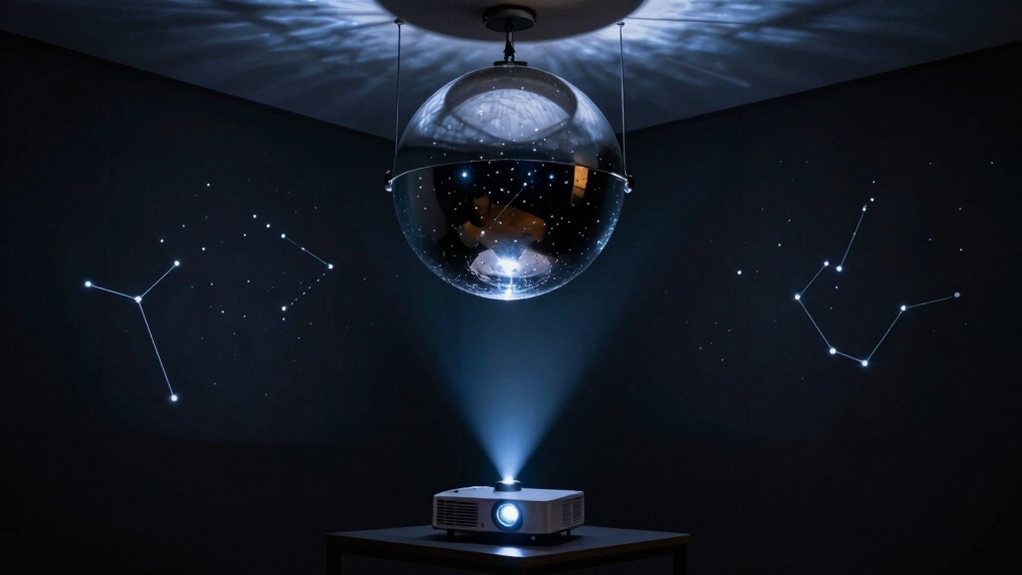
If you’ve already positioned your projector stand in the ideal spot, you’re ready to tackle the most visually striking component of your setup: the convex mirror dome. This installation step transforms your space into something truly celestial.
Here’s how to nail the mirror dome installation:
- Secure the dome atop your projector stand, ensuring its reflective surface aligns perfectly with the projector’s throw path for accurate image transfer
- Verify the dimensions, roughly 10 inches tall by 19 inches wide, fit snugly on your stand without wobbling
- Fasten hooks or stable fasteners to prevent any movement during operation
- Center the reflective surface with your projector’s centerline to minimize distortion
Double-check ventilation and clearance around your stand and dome to prevent overheating and ensure easy maintenance access.
Calculate Throw Distance With Mirror in Place
Why does your stunning mirror dome still produce a lopsided sky? You’ve likely miscalculated your throw distance. Your projector’s throw ratio, distance from lens to screen divided by screen width, doesn’t account for the mirror dome’s reflective curvature, which alters your projection geometry considerably.
Start by positioning your projector stand so the image lands on the dome’s central axis, ensuring even brightness edge to edge.
Factor the mirror’s position and curvature into your calculations, as the reflection effectively lengthens the path your light travels. You’ll need iterative tests: verify your projected image reaches ten feet high and spans sixteen feet wide, then refine accordingly.
Finally, adjust focal length and tilt to compensate for the dome’s geometry, keeping imagery sharp across the entire field.
Sharpen the Image: Focus and Align for 360° Views
Start with these fundamentals:
- Match your projector’s throw length and focal length to your dome’s curvature, so stars stay pinprick-sharp from center to rim
- Tilt your dome 25 degrees to align the artificial horizon with your sightline, eliminating neck strain and distortion
- Run customized software to model brightness and identify reflection hotspots before finalizing placement
- Seal the room against ambient light and distracting colors, keeping your projection the brightest element in view
Test, adjust, and retest. Each iteration refines the immersion until you’re suspended inside a seamless celestial sphere, not merely observing it from outside.
Fix Edge Distortion: Adjust Mirror Angle and Height
Even when you’ve nailed the center focus, the edges of your dome can betray you with stretching, blurring, or that dreaded keystone effect, so you’ll need to wrestle your mirror into submission.
Start your mirror alignment by positioning the convex surface to reflect a centered image directly onto your projection plane, which minimizes edge distortion during dome projection. Next, adjust the mirror height until projected edge lines kiss the dome’s rim, eliminating that keystone warping. Then tilt the angle to match your dome’s curvature, locking in uniform focus from center to perimeter.
Grab a high-contrast test pattern, scrutinize those edge details, and iterate until deviation vanishes. Finally, document your winning angle and height, you’ll thank yourself later, and your optimal viewing zone will thank you now.
Black Out Your Room: Aim for 0.5 Lux or Darker
Once you’ve tamed your mirror and locked in that crisp projection across every inch of your dome, you’re ready to confront the next challenge: your room itself. Ambient light is the enemy of cosmic immersion, so you need to black out your space completely. Aim for 0.5 lux or darker. That’s the threshold where stars truly pop.
Here’s how to get there:
- Seal windows with blackout curtains or temporary cardboard covers
- Kill every light source, including displays and indicator LEDs
- Use a light meter to verify you’re hitting that 0.5 lux target
- Block door gaps with towels or draft stoppers
If perfect darkness feels impossible, focus on eliminating direct light sources and creating uniform dimness. Your dome’s contrast will thank you, and the Milky Way will finally look like home.
Final Thoughts
You’ve got everything you need to transform your space into a stellar classroom. Build it right, test it twice, and don’t skimp on the blackout, your students’ “wows” will make every rivet worth it.
Now dim those lights and let the universe unfold overhead.